Showing posts with label Refurbishing. Show all posts

Wednesday, February 1, 2012

Sports Medal Holders

I found these beauties at a garage sale...


I knew EXACTLY what I wanted to do with them when I bought them. The man collecting the money turned to my kids and said, "Do one of you like teddy bears!?" I held my breath (not having the heart to tell him that I was going to paint right over those little bears), when my 10-year old daughter politely said, "I do." I love her.


After a coat of paint, I realized it might have been best to prime first (I did with the second one).  Thank goodness chalkboard paint is black...it covered those teddy bears right up.  Tada!


My son now has a place to display his sports medals AND a chalkboard for important messages.  I love the quote that's on it now, but I also like that we can change it to fit the latest stage in his life (or simply say GOOD LUCK on game day!). 


I made the other one for my daughter's room. It is still in need of a good quote. Any suggestions?


Monday, January 10, 2011

Jute Lamp - Before and After


We got this crystal lamp when we got married...13 years ago. When we registered for it, yes REGISTERED for it, I thought it would be one of those timeless pieces that you pass on from generation to generation. It's really a beautiful crystal, but it goes with ABSOLUTELY NOTHING in our entire house. I couldn't just get rid of it, so I decided to help it match our decor. I know, this is where some of you are cringing. I did the same at first.


The thing is it has had a crack in it since we received it and the brass was starting to turn. PLUS at this moment, I'm not a fan of brass. Again, sorry.


The first step was to make the lamp look like Superman! Kidding. I wrapped the crystal before spray painting it with Rubbed Oil Bronze paint. I know, it seems weird to worry about getting paint on it if I'm just going to cover it anyway. BUT, I was thinking into the future a bit. It is pretty underneath and someday someone is going to think that the jute lamp is HIDEOUS. They will wonder why anyone EVER covered up a crystal lamp with brown jute and will be excited when they remove the paint to find shiny brass underneath. Times and trends change...I'm making it easier for the DIYer of the future. :)


I love the new paint job! Then I started with the jute. I just hot glued it on as I went. 2-3 inches of glue, then wrapped the jute on top, pressing down gently. Repeat this about 1000 times. Seriously, I think it took me about 2 hours to wrap the whole thing!


Tada!! I LOVE IT!!! It's now at home, next to my bed.


I have plans to redo our Master Bedroom (and yes, giving that table a little attention is on the list). I was having trouble finding my groove to begin working on it. The lamp project was just what I needed!! I'm ready for a full bedroom BEFORE and AFTER!!!


Today's Creative Blog

Wednesday, September 22, 2010

Family on Burlap

***LAST CHANCE...OUR GIVEAWAY ENDS AT MIDNIGHT TONIGHT!***


I found this family tree wall over at For the Love of it awhile ago. I love it. I have always liked the old black and white photos of my family. Like this one of my Grandpa and Grandma taken in the 1940's.

So, when I found this frame at a local garage sale, I knew it would be perfect with burlap in it!!


I wanted to use the word "FAMILY" like Arlene did on her wall. If I find another cool frame, I will probably do "HERITAGE" also. Step 1 was to find a font and size that would fit in my frame. Step 2 was to print it out and then tape in the window. I had to print on a few sheets due to the size of my letters. I then cut them and taped them together on the window.

Step 3: Tape burlap to the window, making sure the letters shine through. I cut my burlap LARGER than my frame so I would have enough left to wrap around the back when it was time to frame it.

Step 4: Grab your sharpie and start tracing. Remove from the window. It should look like this... (Sorry, I can't seem to get my picture turned around today!!)

Arlene used paint to color in her letters. That was my plan too, but the Sharpie was working so well and I liked the color, so I kept coloring with the marker. It was a lot less messy!

There she is!! My glass broke when I was framing it...OOPS!! However, I kind of like that you can actually see and feel the burlap. Now, I just need to get it hung on the wall and surround it with my FAMILY!
Linking up to:
1. Look What I Made on Creations by Kara

Tuesday, September 7, 2010

Organizing with baby food jars

My girls' hair stuff was driving me NUTS!!! I found ponies and headbands all over the house and had finally had ENOUGH!! So, I put out a request to friends with little ones for some baby food jars (Thanks, Michelle)!!!


I started by spray painting the lids with Chalkboard Paint. It took two coats and about 24 hours of drying time in the garage.


Then, I put my girls to work gathering every hair accessory they could find!! They sorted them by color and put them in the jars while we were waiting for the paint to dry.


Lids put on...


Used some chalk to label the tops...


Turned out pretty cute, don't you think!!!??? Quick, easy, and budget friendly. Think of all the possibilities with jars, lids, and chalkboard paint. Marbles, rock collections, crafting supplies...you name it!!!


Linking up to:

Saturday, August 28, 2010

Oil Rubbed Bronze

Several years ago, I had my kitchen decorated in apples. Everywhere you looked, you would find apples...the wallpaper, curtains, napkins, knick-knacks...even the soap!! Over the years, most of my apple collection has found its way into the garage sale. All except this little crock that I used to hold mixing spoons, spatulas, and whisks. It's been setting by my stove for the last 3 years, not going with one thing. It stuck out like a sore thumb.


Until now...


A little Oil Rubbed Bronze spray paint and a vinyl decal and now it's right at home!!


It's the little things that make me smile!! Stay tuned for a few more Oil Rubbed Bronze projects!! I've been having fun!

Tuesday, February 16, 2010

The Transformation - Part 2

I hope that you enjoyed looking at the before and after pictures yesterday. Here are a few more.

BLUE ROOM BEFORE:

BLUE ROOM AFTER:


GREEN ROOM BEFORE:

GREEN ROOM AFTER:


PURPLE ROOM BEFORE:

PURPLE ROOM AFTER:


LIVING ROOM IN BASEMENT BEFORE:

LIVING ROOM IN BASEMENT AFTER:

I hope you are enjoying these! It's been fun for me to go back and see how far we have come!! My favorite transformations are coming soon...I just need to get some better "after" pictures.

Monday, February 15, 2010

The Transformation - Part 1

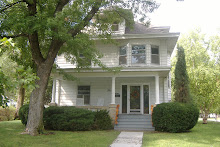
One of the most common questions we get asked is, "How much work did you have to do to fix up the house?" So, we thought we would share some pictures of the transformation of Maple Memories. There are LOTS of pictures...more than I have time to upload tonight...so check back tomorrow for more.

UPSTAIRS RELAXATION ROOM BEFORE:

UPSTAIRS RELAXATION ROOM AFTER:


YELLOW ROOM BEFORE:

YELLOW ROOM AFTER:


There is a quote on the wall of each of the bedrooms. The yellow room says, "We do not remember the days. We remember the moments."

Thursday, September 17, 2009

Laundry Room Sign

I found this collage frame at a garage sale for $1.00. I really liked the frame itself. The yellow collage matting...not so much. I purchased a vinyl wall saying several months ago for my laundry room and have been waiting to put it up. I am still toying with the idea of painting the laundry room at some point and I didn't want to waste my vinyl saying. SO, I decided to use this frame to help solve my dilemma.


The first thing I did was remove the matting and white paper that was inside the frame. I then adhered the vinyl saying to the GLASS of the frame. Now, I needed to create a new background. I went through my fabric and scrapbooking paper, but didn't find what I was looking for. Then it hit me, why not use wrapping paper!!?? It was CHEAP and AVAILABLE!!


So I cut the wrapping paper to the size needed to wrap the backboard of the picture frame.

Remember this doesn't have to look pretty...no one is going to see the back.


The final step was putting it all back together. So simple and easy. It took me about 1o minutes...most of which was spent rubbing on the vinyl saying. I like the paper. Seems fitting for the laundry room, don't you think!? AND the best part is, if I want to change colors or get tired of this, I can just take out the blue wrapping paper and change the background to something else!!! Side note: This isn't the greatest picture due to the glare. Looks much better in person AND you can't tell it's wrapping paper at all!!!


My plan is to frame pictures of my kiddos, all nice and DIRTY, having "loads of fun" all around it. I think this one qualifies, don't you!!??